Monday, February 19, 2018
Sailboat Window Covers
I made these window covers for my brother's sailboat. The perimeter of the windows has a little slot in the extrusion, which holds the covers in place. The slot is about 8mm deep and 6mm wide. The fabric has interfacing sewn into it to give the covers enough stiffness to hold themselves in place. Each window was traced onto clear plastic to obtain the pattern. There are two more small windows I made covers for, not pictured.
These replace a curtain which hung from the taut cord with the clothespins on it. By making the covers instead sit flush to the window, the inside of the boat feels a bit bigger!
Oyster Knife Handle
This is an oyster knife my neighbor was gifted. He liked the shape, but the sharp handle end of it dug into his hand when he pried apart oysters. He hired me to make a handle for it. I knew it would be difficult because the handle tapers in two directions; the handle would have to have a complex mortise to receive it. I drew a handful of ideas, and he liked this version:
I decided to try to make it in two pieces, out of ebony. I roughed out the shape with the milling machine, which didn't have to be super precise as the epoxy would fill the gaps. However, I wanted to keep the fit very tight where the knife protruded from the handle, to make for a clean seam. I reduced the size of the milled slot there, so that I could hand-file the opening to fit the profile of the handle. This was made more difficult because the knife was not symmetrical; it was ground by hand.
Below you can see the reduced neck of the opening where I am filing:
And here they are closed:
I was cleaning as I went, but there were so many tools involved! It was a challenge projecting all the faces of the knife into the handle. This is probably a third or half of the tools I used-
I shaped the front face of the wooden handle before epoxying them together. After it was glued into a solid block, it would be difficult to shape the front face without scratching the oyster knife. Here it is being glued together:
After a couple hours of shaping and sanding:
Here it is in comparison to the original drawing:
In hindsight, it would have taken less time to make a knife from scratch. The result is special though; it looks and feels nice, and it retains the sentimental value of the oyster knife.
Friday, February 9, 2018
Sailboat Cushions I and II
The first two of about ten cushions for the sailboat-
The cushion underneath (above) and below is the first one I made. The wrinkles are due to me not teasing the foam around inside, and putting too much tension into the piping as I sewed.
Below is the inside of the cushion, showing the grosgrain I used to bind the edges of the fabric. This is the ugliest part of these--
This is Sunbrella Dupione Henna fabric, with burgundy v-69 thread.
Below are some more fabric mats I made for dad's drawer chests. These are a little more stable and accurate than the last ones. Like the first part off a CNC machine in a production run, maybe it's more about what you can learn from the first part than the luck factor of getting it all right the first time.
Drafting Square
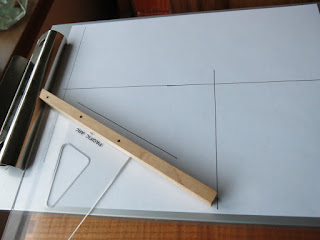
Another accessory for the clipboard. It was stewing in my mind for a few months, the missing piece. The body of the clipboard and clip are quite square to each other.
The screws are countersunk so that it can be flipped upside down and used against the clip:
The angled side can be used for isometric projection:
The fence extends so it can be used with most of the square overhanging the edge:
And it fits nicely inside the clipboard:
Sunday, February 4, 2018
Bias Tape
Not exactly worth a post on its own, but I think this method is really neat. I took two yards of sunbrella, and cut/sewed it in such a way to produce a tube of fabric with the fabric grain 45 degrees to the axis of the tube. Then I cut around it in a helix, to produce one long continuous strip of bias tape. You can search 'continuous bias tape' to find instructions.
Above you can see the intersection of two seams on the far left corner. When I got to the piece of tape which included those seams, I cut out the bulky section and spliced the ends back together.
The tape is for piping around cushions for my brother's sailboat.
The moment we've been waiting for! I wondered how the error in my cutting would accumulate after the ~40 passes--both ends of the fabric tube were parallel when I started. This was the piece that was left:
Alrighty-
Saturday, February 3, 2018
Pencil Rolls, Handle Designs
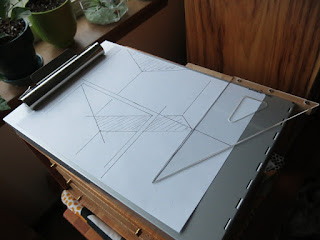
This is a storage clipboard. Despite having reached the heights, experimented with a small but proper writing board, and having spent most my life using a book as a drawing surface, this is my favorite arrangement I've ever had. I prop it on my knees and draw wherever I want. I can tilt it for watercolors, or lay it flat for measuring.
Whenever I need an eraser or scale or more paper I can just open it up.
In the bottom I keep the pencils. I kept my old pencil roll in there for a while, but it was pretty awkward to lift up all the clipboard flaps AND unfold the roll every time I needed to draw. I made these new fitted rolls, so I have two fewer flaps to untangle.
I forget the potential of hand sewing sometimes. I'm going to start sewing the tags on like this, with the blind stitch. Looks sharp, crisp to me.
Despite looking 2D and being a little rough on the edges, I did put some thought into the practicality. For instance, the pouch is cut on the bias so it can stretch a little and the top edge is more resistant to fraying. The hems are designed so the pen clips cannot snag on them no matter how they are inserted.
I sewed all the way through the back, a bit 'How Ya Doin''. If I was making them for someone else, I would do some inverting origami instead of making all these seams visible. It might even be possible to make the seams on the front side of the pockets disappear. Hmm... suppose I should draw it-
The top drawings are ideas for a oyster knife handle my friend wants me to make. The oyster knife was already made, a silly shape for a hand tool, bad design apparently. He said he couldn't really understand the drawing (below), my own bad design! Always remember the purpose of what you're making, always remember the purpose of what you're making...
I started again from the ashes, dusted off my manual drafting, and made the drawing below. Better shape too, I think.
These were a few ideas for a coat hook for my dad, made to match the style of his furniture. He hired me to make sixteen, for some coat trees I also helped with.
He decided on the round design pictured in the bottom right-
Subscribe to:
Posts (Atom)


