Saturday, January 28, 2017

Bowl Turning Spring Pole Lathe


I made this spring pole lathe with bowl turning in mind. It is stout, around 200 lb. The legs are mortised into the feet, and the ways are rabbeted into the legs and fastened with 3/4" bolts. the tool rest and foot pedal are held together with rope now, but it is a functioning machine.

Although this is my only pole lathe experience so far, here are tips for those who found this page in search of info on designing a pole lathe:
  • Keep in mind where your body and knees go (the front way on this lathe intrudes on the leg motion a bit, and I had to shorten the tailstock tool rest support)
  • Heavy is nice, as with all lathes
  • It's going to take some abuse (build it with dents and cracks in mind)


In action-


The spring pole is a fir tree my brother cut down. Having not used other poles, it feels a little spongy but it does the job.


Below are the tools I forged in the wood fired forge. The one on the right works best--important to thin out the tip. They need some wooden handles still.


Wedge arrangement. I decided to keep it simple and not use an adjustable/threaded tailstock center. It works great this way, but I do have to pick up a mallet to adjust the center tightness.


The centers are made of 5/8" tool steel, unhardened. I made them with an angle grinder and the wood lathe. They are plenty accurate and smooth for this job.


Adjustable tool rest-


Monday, January 23, 2017

Tongue and Groove Router Table


I built a router table dedicated to cutting tongues and grooves in 5/16 to 1/2" thick boards. It's all made of wood scraps except for the plywood tabletop itself. I made a handful of mistakes as I went along, designing and cobbling it together as I went. That said, the finished router table is completely functional and accurate, just a little weird looking.


Above is the wooden fitting that accepts the 4" dust collector hose. The clever router clamp made by Bosch has a hex broach cut into the bottom of the height adjustment screw, so that it can be adjusted from above the table using the T-handle hex key as shown above.

Below is one of the wooden fingers. I was going to install a cam to apply pressure downwards, but the big flat head hex drive screw holds it in place pretty well. The backside of the finger is relieved so that it does not squeak against the fence when it moves.


Plywood knobs. The screw is mortised into the underside of the table so it doesn't spin as it's tightened. 


The base of the router is mortised into the table so that the spindle nose can be raised above the surface of the table.


Here are the router bits for cutting the grooves, assembled.


And here's a shimmering new push stick to round it out!

Wednesday, January 11, 2017

Jacket Repair, Table Saw Switch


My brother got a hole in the shoulder of his jacket while he was playing bocce or tetris battle or something. I patched it with a scrap of nylon. The patch is shaped to just cover the holes.


I also installed a new switch on an old Rockwell Unisaw. It's a bit out of the way by request of the owner.


I will post more photos of this saw after I install the new fence.

Tuesday, January 3, 2017

Brass Knobs


I made 60 Ø 5/8" (16 mm) brass knobs for furniture my dad makes. These knobs are for a dresser and a sideboard. They are tapped 10-24 on the backside as deep as I dare, finished with a bottoming tap, for ease of installation. Although they are very simple, the clean lines stand out. They also radiate qualities of solid brass to me, somehow it's clear they aren't plated. I think it's a result of the flatness of the top surface and well-defined profiles.

In any case, they aren't much of a machining challenge but we do like the way they look.


The matte ones are after abrasive finishing, the finished product.


Sunday, January 1, 2017

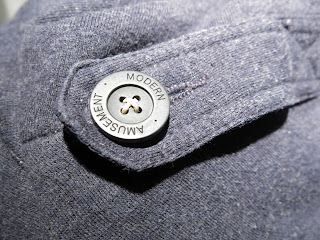
Coat Buttons Repair


The buttons started falling off my coat. It looks like they were hand sewn originally, and my heart goes out to the person who has to sew 400 buttons a day for a pittance. I only had to sew ten and I'm already blogging about it to soothe my ego.


The real purpose of this post was to show my materials of choice for durable repair sewing:
  • Waxed linen- I got a pretty sizeable spool from McMaster (Item No. 3858T13). Really pleasant to work with, does not tangle easily.
  • W. Smith and Sons needles- also a pleasure to use. They are expensive but this type of thing pays for itself after a single use (in the U.S. anyway)
  • Sailmaker's palm- buy it or make it. I got a W. Smith one and it works great, the quality is nothing to write home about though.
  • Needle puller- pliers work, but I use a piece of rubber or leather. Often hard to get the head of the needle through the material without something to grip the smooth needle body with.  


Happy repairing-