I drew a sketch of my idea first, since originally dad was going to make them:
He was busy making other things, so I took the drawing back to give it an authentic crumpled, shop-worn appearance. Complete with sloppy long addition. You will see I changed the stands a bit to accommodate the scrap wood we had. I also did some of the jointery differently than on the drawing.
The lights are (2) Impact FF-S1 and (1) Impact FF-OF4. The quality on them is nothing to write home about, but it was nice that the softboxes attached to them so easily.
The back leg is attached with pegs made from nails. The back leg and brace detach so that the unit can store flat against the wall. If I was making this for someone else, I would either buy proper locking pins, or 1/4" solid steel rivets to use for pins, or turn them of hardwood-probably 1/2" in diameter.
Finish is also lacking a bit--we usually do better, but these stands are for throwing around and tripping over.
The side legs are mortised into the pole. They touch in the center. It wouldn't be too hard to make folding side legs, which would allow them to take up even less space. We didn't need that feature though.
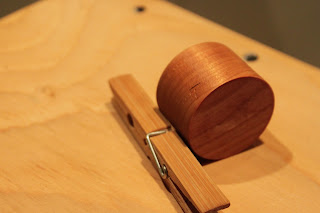
Here is the knob posted earlier, doing its job. The threads are lubricated with lanolin. The bolt is a carriage bolt, and the square shoulder fits into a square hole on the other side of the arm. The knob does need to be tight to support the heaviest light, but not excessively so.
For heavier lights, I would either shorten the arm (necessary for balance anyway), or make a triangulated two-arm arrangement which would be very strong. The design is all modular, so if we need a long arm for the big light it'd be easy to make one of a different design.
This is the light mount, turned of cherry. If I did this right, I'd buy a 5/8" solid (hardened?) steel shaft for this so the setscrew on the lights wouldn't damage it... this is good enough for our purposes though. To really make it right, I'd make a new light component out of wood that pinched the shaft instead of pushing a setscrew at it.
This seems to be a difficult subject. I spent 20 hours creating this infographic to enlighten the world. Share it with your friends and the president.
On a different note, here's the slingshot I made a year ago, with its first set of bands and new pouch for shooting steel and airsoft bb's.


