Sunday, March 27, 2016

Lightbox, Cleats III


Fir body, walnut top. The glass was from a broken scanner. The back of the glass is covered in self adhesive PVC film. The glass is held firmly in place by a friction fit around the edges.


Wish the screws would have backed out on the light socket terminals so that I could have done a more pretentious connection, but I couldn't unscrew them without breaking the terminals. LED bulbs total 7 w. It doesn't even get warm to the touch.


 Finger joints.


I sewed these new cleats to help them last longer, symmetrically this time. The stitches are staggered for strength (in theory). I ground a triangular cross-section HSS drill bit to perforate the plastic sole which worked perfectly. A regular twist drill gets tangled on the fibrous innard and bends/breaks.

Tuesday, March 15, 2016

Slingshot Catch Box, Cleat Repair


Above: Lid removed, looking down into
Below: Ball chute


Best catch box yet. From the factory of useless whimsy and universal appeal.


The paper front keeps the light bb's from bouncing out, is not necessary for steel balls. The lid lifts off and holds the rags to stop the projectiles.


Fixed cleat in the early morning. I got the idea from this guy. Props to him for using transformer wire, a nail, and whatever thread he had! Unusual guy, unusual video. After doing this a bunch of times, I've found three things are really helpful:
  1. .020" music wire - strong and stiff
  2. The strongest, thickest thread you can find. I used V-346 Kevlar
  3. Handles on wire

Friday, March 11, 2016

Fir Spatula, Opinel


These are not a spatula.

This is a spatula thing:


I was using the alder spatula for making fried rice, but it didn't scrape the pan well enough. The wood was relatively soft and the edge rounded quickly. I thought I'd make a spatula edge of the hardest material known to man: douglas fir winter growth ring.

I also bought a pocket knife. It's made by Opinel. I did futz with it a little though.


Now the avocado oil bottle has company (it stays attached to me too).


Sunday, March 6, 2016

Beam Compasses, Wok Handle, Golden Ratio Dividers

Beam compasses, I made for myself of cherry. Steel thumb screws. I bought the points from Tools From Japan.


The left point is held with socket head cap screws. The beams are hand planed dovetails; very smooth and accurate. The points/pencil are held in place with tapered wooden pins I whittled. Actually, they are mostly held in place by friction, but the pins are there in case the holes get looser. The top half of the point holders have a larger hole which slides easily across the point.

This photo is garbage, but here is the long and short one next to each other. The long one will draw a 800mm radius or so. 


Wok handle (just the wooden part), I made of alder. Air dried alder is so nice to work with. Some pieces end up looking a bit like cherry too, like this one. Wok seasoning under way.


Golden ratio dividers, made of cherry. Can do about a 5.5' span. Uses shoulder screws, so the wood pivots on a smooth surface and the screws won't come loose.


Dammit!

Tuesday, March 1, 2016

Slingshot Pouch Clamp, Two More Slingshots

First, for those unfamiliar with slingshots, I'll explain a bit about pouches and bands. A pouch is what the projectile sits in, the bands are the stretchy part. Sometimes slingshots use tubes instead of bands, which are the same in principle but the former is a straw shape and the latter is a flat shape. Tubes usually last longer before breaking, and bands usually are more efficient (shoot faster).

People with too much time and too few responsibilities in life will often try to make their slingshots shoot faster and more accurately. Intuition tells us to put bigger bands on the slingshot, but this only works sometimes. It usually helps shoot heavy projectiles faster, such as a 14mm steel ball or larger. Generally though, the fastest (velocity) slingshots have thin, light, long bands cut in a certain shape, with the lightest pouch possible, the densest projectile, and the warmest weather. Thin bands and a light pouch are also relatively easy to pull back, and they don't hurt your hand when they spring back. There are many other variables too, but these are some of the important ones.

All this comes at a cost, in this case it's durability. The slingshots which push the limits of speed might only last ten shots before the bands/pouch break.

I only have the patience to fix my slingshot every couple hundred shots, but I still want a fast slingshot so that I can write long winded blog entries about it and sleep soundly at night.

To make the otherwise light pouch more durable, I sew a knot thing into it which takes some of the strain off the leather. To help keep the thin bands from tearing, I put silicone grease on them every 20 shots or so. The bands usually break where they attach to the pouch, so I attach them carefully with a very thin (Theraband yellow) strip of latex wrapped in a certain way. This requires four hands, two to hold the work and two to tie the tie. Some people can do it with just two; I am not some people. I made myself a set of two wooden hands to help attach bands with latex rubber instead of string:


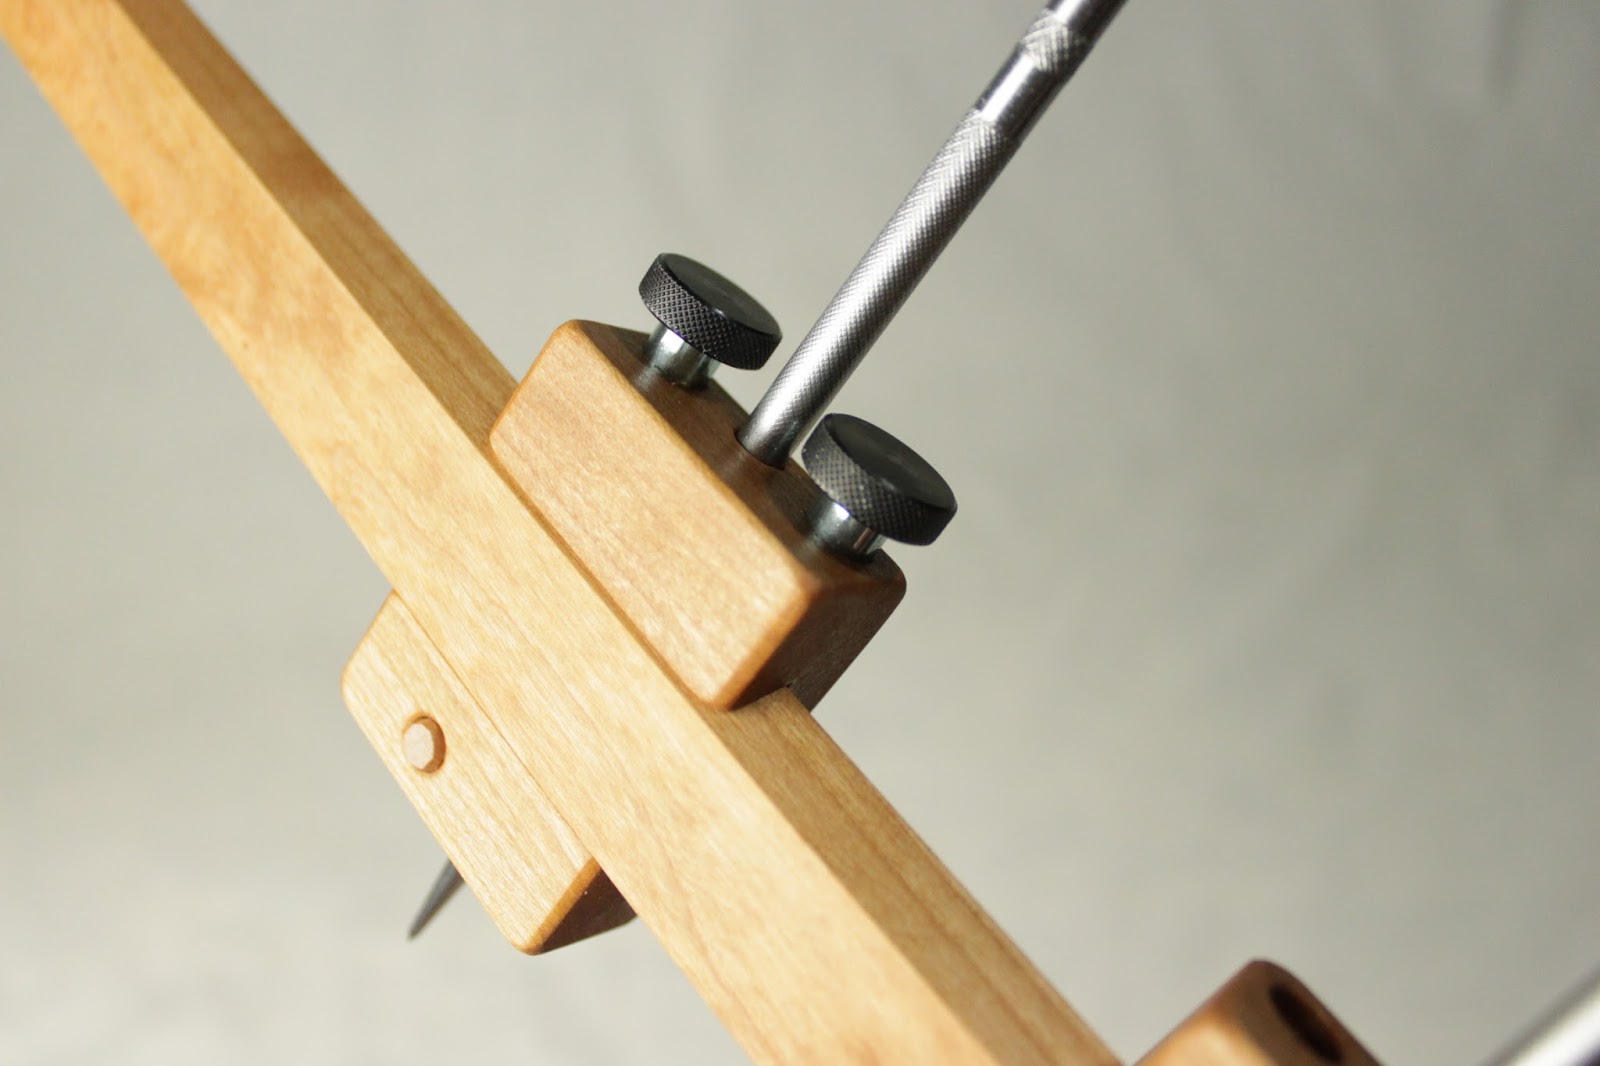
It did its job. Kind of fiddly though, for an already too-fiddly job. I needed better hands! So I made this today:


In use


This one has more space for my clumsy fingers to manoeuvre around. It has big thumb nuts which tighten easily. The springs under the clamps hold them open until they are tightened, and the screws at the back keep them from swivelling willy nilly left and right GOOD GRIEF STAY PUT YOU INCOMPETENT MUNG BEANS. It is coated in walnut oil and has rims that don't spin. Ladies.


Here is the first pouch hot off the press. Next to it are cannonballs 4.5mm bb's. It is the smallest one I've made yet. Snappy lil one; can put a steel bb in one side of an aluminum can and out the other.


Tiny pouch attached to this little cherry slingshot, approx 100 mm tall by 70 mm wide. It is meant to shoot bb's and airsoft bb's.

If you scroll back and forth between the two photos quickly it looks like a writhing protozoa. Disclaimer: I don't know what a protozoa is.

I made another from the same pattern, but I carved it differently.