It can be done most accurately and versatilely with a drafting table/machine, but here I'll show how to do it "in the field" with a sheet of paper, a pencil, and the tubes to be joined. The concept can be expanded to 3+ tube intersections and complex tube/shape profiles such as aero tube or rectangle tube. I'm leaving that out here; I figure if you can understand what's to follow you should be able to figure out how to make coping patterns for the wildest airplane fuselage. Otherwise, I can give you some pointers if you email me.
First, wrap your blank paper around the tube to be coped ("coped tube") and mark the circumference to the edge of the paper:
Unwrap:
Divide circumference into eight, sixteen, or any number divisible by four. More divisions yield greater accuracy and more potential for mistakes. If you divide into eight or sixteen, you can do it just by folding the page. Fold left corner to mark. Then fold left corner and mark to first dividing fold... keep dividing till you are content. Eight divisions is plenty for <3" diameter tube.
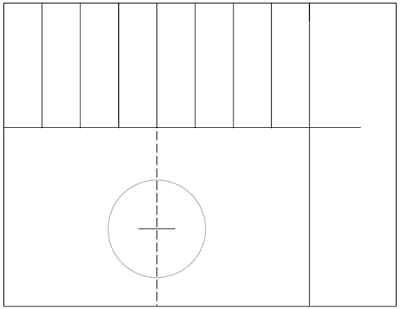
Trace your coped tube profile over the center line, towards the bottom. If you want the tube to be chamfered around the cope for welding, trace/draw the inside diameter. If you want to end up with a maximum-surface-contact fit, trace the outside diameter. You can use a compass, or just trace the tube directly by centering the end over the line. I have shortened the division lines for clarity:
Draw a baseline for your tube cope. If it is going to take up a lot of the tube (e.g. steep intersection), it will also take up a lot of the page, and the baseline should be drawn lower on the page to leave room:
Divide the coped tube profile into equal radial segments. Same division
as the circumference: in this case eight divisions. 360 degrees divided
by 8 in our case is 45 degrees. Draw these lines radiating from the center of the
coped tube profile. Conveniently, you can fold the paper diagonally to divide the
circle. You can also use dividers, a protractor, a ruler, or even
eyeball it.
Now, trace the profile of the non-coped tube ("target tube") above the first one. The
edge of the target tube profile should sit atop the baseline. If the axes of
the tubes line up, trace it that way. If there is a 10mm offset, trace
it 10mm off center. It might help to think that the coped tube is
'looking up at' the target tube.
If the target tube is smaller in diameter than the coped tube, the edges of the coped tube will shoot off to infinity unless we constrain them with a line. In that case, you draw horizontal lines out from the widest point of the target tube as shown in the example below. The target tube is an oval, shown in maroon. The constraining lines are red.
For clarity, I'll do a simpler cope now. The target tube will be the same diameter as the coped tube:
Numbers to aid in concept:
Now at 45 deg.:
See where this is going? Keep following the circle around...
The full 360 deg.
You will have to connect these blue dots into a continuous line. If you are uncertain about what the line does at a specific point, just make an approximate 'ghost' division and do the same thing you would with the other divisions:
We now have the dots plotted to make a 90 degree tube cope. For our example, we want a 55 degree included angle, like this, but coped better:
SO, we draw that angle onto our page:
Full 360 deg.:
The mirrored point is to aid in drawing the continuous connector line, the interpolation if you will. Most tube copes are symmetrical and you can use this to your advantage. To mirror points on regular paper, just fold along the line of symmetry, hold up to the light, and plot your point. On thicker materials, dividers are your friend.
Let's connect the dots smoothly, see what we've got:
Of course, the proof is in the pudding... it feels wrong to print this out, since the whole point of the tutorial is to show how to cope tubes free of a printer/computer, but here we are:
My water bottle is a touch large in diameter for the pattern, but it's a very close fit regardless.
That's how it's done!
Now, the oval example demonstrates an important note:
These leaders point at abrupt changes in the target tube. These must be transferred to the cope tube, and 'ghost' divisions must be made or you will have lots of extra material removal to do:
The full 360 deg. works out to this:
That's all, folks-


No comments:
Post a Comment